30+ Dollar Store Farmhouse DIY Projects That Look Expensive
Skip the intro · jump to the list ↓
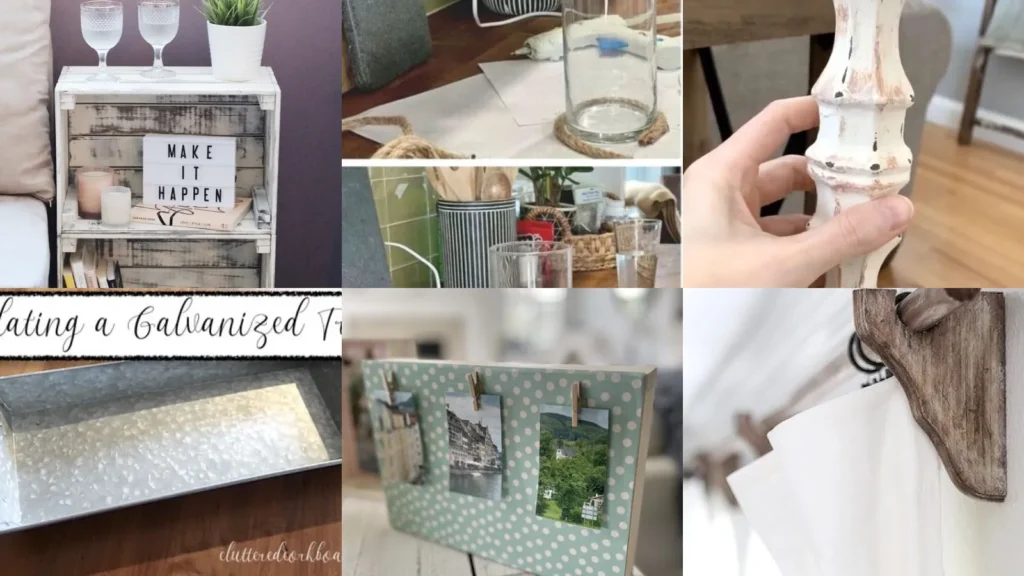
There’s a myth going around that farmhouse decor has to cost a fortune. Not true at all! Some of the coziest looking shelves and signs out there started as a two dollar frame or a plain glass jar.
This list is here to prove it. We scrolled through hundreds of pins looking for projects that actually hold up in a real house, not just a perfectly lit photo.
Everything below skips the fancy tools. Most of these need paint, glue, twine or a little sandpaper. That’s about it!
The goal was simple. Keep it doable, keep it cheap! Keep it something you’d actually want sitting on your counter.
So grab a basket and head to your nearest dollar store, because every single one of these starts there. You’ll be shocked how far a few plain jars and some rope can go, lol!
Below you’ll find 30 ideas with the little details that make each one work, plus a link to the full tutorial under every point.
DOLLAR STORE FARMHOUSE DIY IDEAS
Rustic Wood Crate Shelf
We’re starting off strong with a wood crate shelf. These stack right on the wall with basically zero hardware showing!
A little wood stain brings out the grain and makes it look pulled from an old barn. This is the shelf that finally fixes that awkward blank wall space. Even one crate alone makes a difference.
- The blank wall fix
- Stain brings out the grain fast
- No fancy tools needed
Mason Jar Utensil Holder
Mason jars turn into a sweet little utensil holder in about ten minutes. Line a few up in a wood caddy and suddenly your counter looks intentional!
Spoons, spatulas and whisks finally have a home instead of sliding around in a drawer. Who doesn’t love a drawer with less clutter in it?
- Counter clutter, solved
- Ten minute project
- Holds every spatula you own
Galvanized Bucket Planters
Galvanized buckets make surprisingly good planters. The metal ages beautifully outdoors and gets that soft worn look after just one season.
Drill a few drainage holes in the bottom before adding soil. This one works for porches, patios or a sunny windowsill inside. Even a small herb plant looks charming in one.
- Ages like a charm
- Drill holes before planting
- Works indoors or out
Farmhouse Style Wall Clock
A plain clock face gets a whole new personality with some wood trim glued around the edge. It’s honestly one of the easiest swaps on this whole list!
Distress the trim a bit with sandpaper for that lived-in farmhouse look. Ten minutes, tops.
- The easiest swap here
- Sandpaper does all the work
- Fits any plain clock face
Distressed Wood Picture Frames
Plain dollar store frames go from flat to farmhouse with sandpaper and a little white paint. Rough up the edges after painting so the wood underneath peeks through.
How good does a whole gallery wall of these look together? Mix in a few different sizes for the best effect.
- Flat to farmhouse fast
- Sand the edges last
- Mix frame sizes for interest
Burlap Table Runner Diy
A burlap table runner might be the cheapest transformation on this entire list. One roll from the craft aisle covers a whole table with plenty left over!
Fray the edges a little for texture instead of hemming them. Same trick works on placemats too.
- Cheapest fix on the list
- One roll covers the table
- Fraying beats hemming here
Rope Wrapped Vases
Wrap plain glass vases in jute rope and they instantly look like they came from a farmhouse boutique.
Hot glue holds the rope in place row by row.
This trick works on vases of any shape, tall or short.
Either way it turns a dollar store vase into something worth showing off, haha!
- Boutique look, dollar price
- Hot glue holds every row
- Works on any vase shape
Chalkboard Kitchen Labels
Chalkboard labels finally make the pantry look like it belongs on a magazine cover. Stick them on jars, bins or baskets and just write in whatever’s inside.
They wipe clean, so relabeling for a new grocery haul takes seconds. No shame in redoing them weekly, lol!
- Pantry, finally organized
- Wipes clean in seconds
- Sticks to jars or bins
Whitewashed Wood Signs
Whitewashing a plain wood sign gives it that soft, aged look without actual years of wear. Water down white paint, brush it on and wipe off the excess right away.
It’s the trick behind almost every farmhouse sign you’ve seen online. Not in my book is there an easier weekend project.
- The trick behind every sign
- Water down the paint first
- Wipe excess off immediately
Tiered Tray From Plates
Stack a couple of plain plates with a wood dowel through the middle and you’ve got a tiered tray worth way more than what you paid!
This one holds soap and towels in the bathroom or turns into a snack tray for guests. It really does both jobs well.
- Does double duty easily
- Dowel holds it all together
- Works as bathroom or snack tray
Wooden Bead Garland
Wooden bead garland has been everywhere lately. It turns out you can make your own for a fraction of the boutique price!
String the beads on jute twine and knot them every few inches. Drape it over a mantle, a mirror or a stack of books.
- The look, not the price
- Drapes over mantles or mirrors
Faux Shiplap Wall Accent
Faux shiplap gets built from thin foam board or lightweight wood strips instead of real lumber. It’s lighter, cheaper and honestly just as convincing once it’s painted.
This one is perfect behind a bed or above a fireplace. Just measure carefully so the lines stay even, or things will look crooked fast.
- Lighter than the real thing
- Foam board keeps it light
- Measure lines before cutting
Farmhouse Candle Holders
Plain glass candle holders turn rustic fast with a coat of matte spray paint. Add a strip of twine around the base for extra texture.
Grouped in threes on a mantle, they look like they cost way more than they did. How great is that?
- Grouped in threes, they shine
- Matte spray paint changes everything
- Twine adds instant texture
Rustic Herb Garden Jars
Mason jars mounted on a wood board make a herb garden that actually looks good on a kitchen wall. Basil, thyme and mint all fit comfortably in one jar each.
It saves counter space and keeps everything you need for dinner within reach. Same setup works great for a mudroom wall too.
- Kitchen wall, put to work
- Jars mount right on the board
- Saves counter space entirely
Painted Mason Jar Vases
A coat of chalky paint turns plain mason jars into vases that look like an antique store find.
Wipe the paint while it’s still wet for a streaky, weathered finish.
These jars end up looking like they’ve been sitting on a farmhouse shelf for years.
- Antique store, dollar aisle
- Wipe paint wet for texture
- Fits wildflowers or baby’s breath
Farmhouse Fruit Basket Display
A wire basket filled with apples or lemons makes an instant farmhouse fruit display. Line the bottom with a cloth napkin so nothing rolls around.
Swap the fruit by season and the whole display feels brand new every time. Am I right?
- Cloth napkin keeps fruit steady
- Changes with whatever’s in season
Wood Slice Coasters
Wood slice coasters are one of those projects that feels fancier than it actually is. A little sanding and a coat of sealant keeps drink rings from ruining the wood.
They make a sweet little gift for a neighbor too, tied together with twine, haha!
- Fancier than it looks
- Sealant blocks drink rings
- Ties together as a gift
Galvanized Tray Centerpiece
A galvanized tray pulled together as a centerpiece might be the fastest project on this whole list! Group candles, greenery and a few pinecones right on top.
This one works on a dining table or a coffee table equally well.
- Fastest project here
- Group candles and greenery
- Fits dining or coffee tables
Twine Wrapped Mason Jars
Wrapping plain jars in twine gives them that rustic texture without any paint at all. Hot glue the twine at the top and bottom so it doesn’t unravel.
These work as vases, candle holders or even little pen cups on a desk. Who doesn’t love a project with three uses?
- Glue twine at top and bottom
- Doubles as a desk pen cup
Rustic Wood Bead Bowl Filler
Wood bead bowl filler might be the laziest project on this list. That’s exactly why it works! Dump a bag of beads into any bowl and call it decor, lol!
It looks intentional on a coffee table or tucked into a bookshelf. Zero glue, zero setup time.
- Zero effort, still cute
- No glue required at all
Farmhouse Bathroom Storage Bins
Plain wire or wood bins hold towels, toiletries or extra toilet paper without looking like storage at all. Label each one so guests can actually find what they need.
The bathroom counter finally looks less like a drugstore aisle. Same!
- Bathroom, less drugstore
- Labels keep guests from guessing
- Hides toiletries in plain sight
Old Window Frame Decor
An old window frame turns into wall art once you swap the glass panes for chalkboard paint or mirror pieces.
Thrift stores are the best place to find one cheap.
This one turns a dusty old window into the room’s focal point.
- Thrift find, big impact
- Chalkboard panes work great
- Becomes the room’s focal point
Farmhouse Style Coffee Bar Sign
A little wood sign that reads something coffee related is basically required for a farmhouse coffee bar at this point, am I right?
Stencil the letters on and distress the edges after.
It fits right in behind the mugs and syrups like it was always there.
- The coffee bar essential
- Stencil letters, then distress
- Props right behind the mugs
Clothespin Photo Display
Clothespins clipped along a length of twine make the easiest photo display around. String it across a wall and clip on photos, cards or little notes.
It changes in two minutes whenever you want a new lineup. Same setup, brand new look every time!
- Changes in two minutes
- Clip on cards or photos
- Restyle it anytime you want
Rustic Ladder Shelf Diy
This is the project for renters who can’t put holes in the wall. Stack blankets, books or plants on each rung. No drilling, no landlord drama, no excuses!
It looks intentional every single time. How cute is that?
- Renter friendly, no drilling
- No wall holes required
Painted Wood Slat Sign
Painted wood slats lined up side by side make a sign with real texture built right in. Paint a simple word or phrase across the slats once they’re joined.
The gaps between boards give it a rustic edge you can’t fake with a flat board.
- Texture you can’t fake
- Join slats before painting
Burlap Wrapped Frames
Wrapping a frame edge in burlap gives it a soft, textured border that plain paint just can’t match. Hot glue the fabric around the frame and trim the corners neatly.
This works especially well for frames holding black and white photos. Simple as that.
- Trim corners for a clean edge
- Pairs well with black and white photos
Farmhouse Style Lantern Diy
A plain glass lantern gets the farmhouse treatment with some twine, a candle and maybe a sprig of greenery tucked inside.
It works year round, not just for one season.
A few different sizes grouped together turn a porch step into the coziest entryway around, lol!
- Twine dresses up plain glass
- Group sizes on a porch step
Distressed Metal Bucket Decor
Distressing a metal bucket takes about five minutes and completely changes how it looks!
Sand a few random spots down to the bare metal for that worn, rusty edge.
Whether it holds firewood, blankets or a plant, it earns its keep instantly.
- Five minutes, huge change
- Sand random spots for rust look
- Fill with firewood or blankets
Farmhouse Style Curtain Tiebacks
Last but definitely not least, we have farmhouse curtain tiebacks made from rope or twine. They’re such a small detail, but they finish a window off completely!
Loop the rope, add a wood bead or two and hook it onto a cup hook by the frame. Simple, cheap and somehow the whole room looks pulled together, haha!
- The window’s final touch
- Loop rope with a wood bead
- Hooks on with a cup hook